ICS2 - Arrival Manual
How to create an ICS2 Arrival in EmmaSped NO
Manual registration:
To start a new registration use F5 to clear the screen.
Use F11 to save, and INS to send the arrival

IDNr: Just press Enter in this field, and a value will be assigned automatically when saving.
Type: Select Arrival.
Reference: Unique reference. Populated automatically if not filled.
LRN: Unique reference. Populated automatically if not filled.
Mode of transport: For sea this should be 1, 3 for road, and 4 for air.
Identification: Only used for sea and road.
Type: Only used for sea and road.
Conveyance reference number: Flight number
Estimated arrival date: Can be sent instead of Related MRN if you are sure all ENS’s are sent using the same estimated arrival date and time.
Actual arrival date: Actual date and time of arrival.
Customs office: Select the correct customs office, the first point of entry within EU.
You can search for number or name in the dropdown, e.g. write “gard” and press enter to select NO351001 – Oslo Gardermoen.
Related MRN: Press the + button to add rows. Needs to contain all MRN numbers received for the pre arrival-ENS’s on the flight.
or click the "collect ENS MRN" button to add ENS MRN from all approved ENS
Only ENS in status 9 will be visible
Related Transport Document: Not used.


Notifying Party: Press the + button to add rows. Only used if you want another party to receive the response messages as well. EORI-number.
Communication: Press the + button to add rows. Phone number or email address for the Notifying party in the Identifier column. Select the corresponding type in the drop down in the Type column (EM – Email, TE – Telephone).
Person Notifying the Arrival: Press the + button to add rows. Your EORI-number, since you are the one notifying the arrival.
Communication: Press the + button to add rows. Your phone number or email address. Select the corresponding type in the drop down in the Type column (EM – Email, TE – Telephone).
Template registration:
You also have the option to create templates for your arrivals to streamline the registration process.
See guide for Template
Check status:
Messages are sent and received every minute. When an Arrival is approved the MRN field on the top row will be filled with the MRN received in the response message.
As in other modules you can use F6 to see the arrivals sent to customs (EU), and F7 to see all arrivals. Normal search functionality is available. If you don’t see any, delete the value in the Signature field and select --Alle--

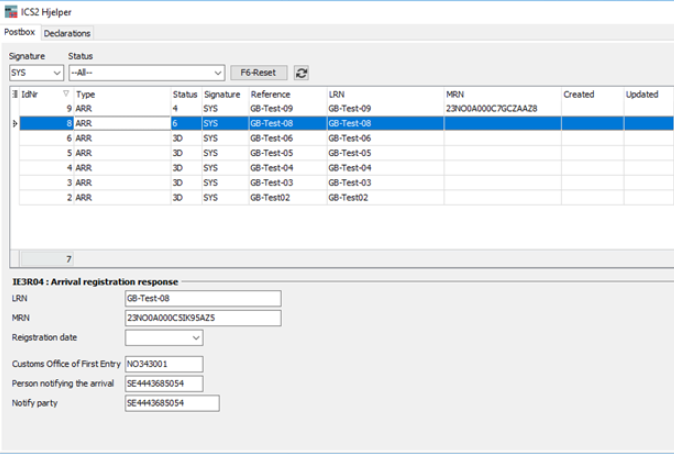
In the F6 – PostBox screen you can see all messages sent and received for the selected arrival.
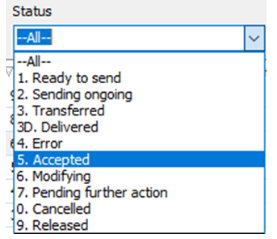
The Status will tell you if you need to do something about it.

After you press INS, the message will get status 1. When the sending starts it will get status 2, then 3 when it is sent.
If the webservice was able to process the message, you should get 3D - Delivered, with a connected MRN. This MRN can be found in the overview and also on the top row of the detail/registration screen.

If it gets 4 – Error it should be possible to see the error message in the bottom part of the screen. Use the arrows to move between messages.

You can use the Correction-button in the bottom right to “reopen” the arrival (status 6) so that it can be corrected and sent again.
If a control message is received for any of the house consignments on the flight, it will get status 7 – Pending further action. You can see the control message(s) (one per house) in the bottom part of the screen.
As far as we know (based on limited test scenarios in the test environment), we will never receive a release message (status 9) or an accepted message (status 5) other than the one setting status 3D.

.png?width=300&height=100&name=emma%20logo%20santa%20hat%20(4).png)